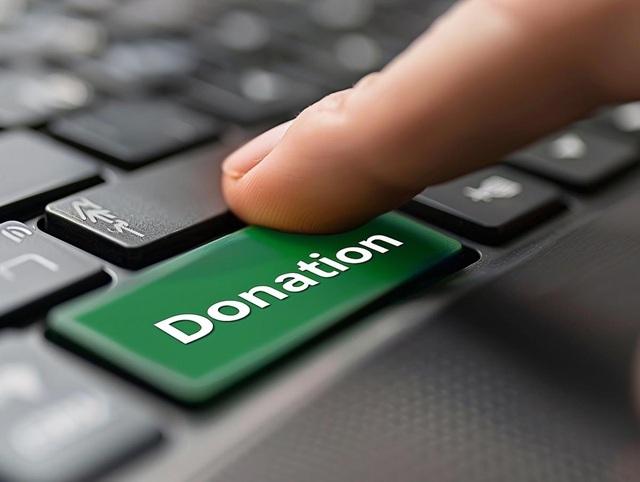
If you’re a Twitch streamer, building a supportive and engaged community is key. However, sustaining your channel financially is just as important. But the real snag is that achieving both is not easy. Ad revenue and subscriptions can contribute to your earnings. Then there are donations, which remain as one of the most direct and flexible ways for your viewers to support your content. And to increase your viewership on Twitch, GrowthMount can help you.
Let’s face it, some of you are just hobbyists looking to upgrade your gear. Others are aspiring full-time streamers looking to maximize their income. Whatever you’re up to, this complete guide will walk you through how to allow donations on twitch. We’ll cover everything from third-party platforms that you can use, to the best practices for security and transparency.
Why Set Up Donations on Twitch?
Before we dive into the “how,” let’s look at the “why.” Donations are important for any Twitch streamer:
- Voluntary contributions from viewers who enjoy your content
- Typically, not subject to Twitch’s revenue split (unlike subs or Bits)
- A way to fundraise for goals (like a new PC or charity)
- Often paired with alerts that boost engagement and hype during streams
Many streamers earn a significant portion of their income through donations. These are especially helpful in the early stages before hitting Twitch Partner or Affiliate status. At this stage, such options as ViewBotter can help you boost your viewership and speed up your channel’s performance.
Can Twitch Handle Donations Directly?
Twitch does not offer a built-in donation system outside of Bits (Twitch’s own virtual currency) or subscriptions. Both options give Twitch a share of the revenue, and they offer limited customization.
Therefore, to accept real cash donations, you’ll need to use a third-party platform. This is where most Twitch streamers turn.
Popular Platforms for Twitch Donations
Here are the most common platforms for handling Twitch donations:
1. Streamlabs
Streamlabs stands out as one of the most convenient options for streamers for several reasons;
- Supports PayPal, credit cards, and more
- Allows custom donation alerts
- Easily integrates with Streamlabs OBS (SLOBS)
2. StreamElements
StreamElements is a close second, if not equal or even better;
- Similar features to Streamlabs
- Integrated with OBS and browser overlays
- Offers 100% free tools and no platform fees
3. Ko-fi or Buy Me a Coffee
Ko-fi is more “tip jar” style. It is a great option for creators with audiences beyond Twitch (e.g., YouTube, art, blogs)
4. PayPal Direct Link
You can also just link your PayPal.me for basic donations. It offers zero customization and no alerts, but it’s easy.
Step-by-Step: Setting Up Donations Using Streamlabs
Let’s walk through the most popular method – setting up donations via Streamlabs.
Step 1: Create a Streamlabs Account
Go to https://streamlabs.com and click “Log in” then choose Twitch to link your account. Next, approve permissions so Streamlabs can access your Twitch profile.
Step 2: Set Up a Donation Method
Once logged in, navigate to the dashboard, then click on Settings > Donation Settings. You’ll be prompted to link a payment processor, such as;
-
- PayPal (most common)
- Credit cards via Stripe
- UnitPay or Skrill for global payments
Follow the instructions to link your payment account.
Step 3: Customize Your Donation Page
Under Donation Settings, click “Settings” again, add a custom title, description, and even an image or message for your viewers. Set minimum donation amounts (e.g., $1.00 to avoid spam). Next, add preset amounts like $5, $10, $25.
Step 4: Copy Your Donation Link
Once everything is set, copy your custom donation URL (it will look like streamlabs.com/YourTwitchUsername). You can now share this link with your viewers.
Step 5: Add Donation Alerts (Optional but Recommended)
Go to All Widgets > Alert Box. Enable Donations. Customize sounds, animations, and messages. This creates a fun moment whenever someone donates.
Add the widget’s browser source URL to OBS or Streamlabs Desktop to have alerts show up on stream.
Step-by-Step: Setting Up Donations Using StreamElements
If you prefer StreamElements, follow the next steps;
-
Go to streamelements.com and log in with Twitch
-
Click on “Tipping Settings” under the Revenue tab
-
Connect a PayPal account
-
Customize your tipping page (name, message, image, etc.)
-
Copy the tipping URL and share it on your Twitch channel
-
Set up alerts in your Overlay Manager to display donations on stream
How to Add Your Donation Link to Twitch
Once your donation page is live, make it easy for viewers to find. This is where you add it to your Twitch Panels.
Go to your Twitch channel, scroll down to the About section and click “Edit Panels”. Next, Add a new text or image panel. You can title it something like “Support the Stream” or “Donate”. Then paste your donation link in the URL field.
Also, make sure to mention it in your stream chat or bot. Basically, let viewers know how donations help (e.g., “Donations go toward upgrading my mic!”) But, don’t beg – just inform your audience. Let your content encourage support.
To Wrap it Up…
Do not be shy to ask for donations from your audience. And by now, you have all you need to know to set everything up nicely. And while at it, remember the following. First, be transparent – inform viewers what is the purpose of the donation.
Remember to thank donors on and/or off stream. Having a “Top Donor” or “Recent Donations” widgets to keep things rolling. Also, make sure to set boundaries (such as a minimum donation) to keep spammers at bay. Another clever trick is to disable chargebacks on your PayPal account to prevent refund issues.